
From Raspberry Pi to a Custom NAS: Engineering Decisions Behind the Build
How hardware constraints, storage decisions, RAID1, removable SSD trays, and a custom Fusion 360 enclosure shaped my Raspberry Pi-based home NAS.
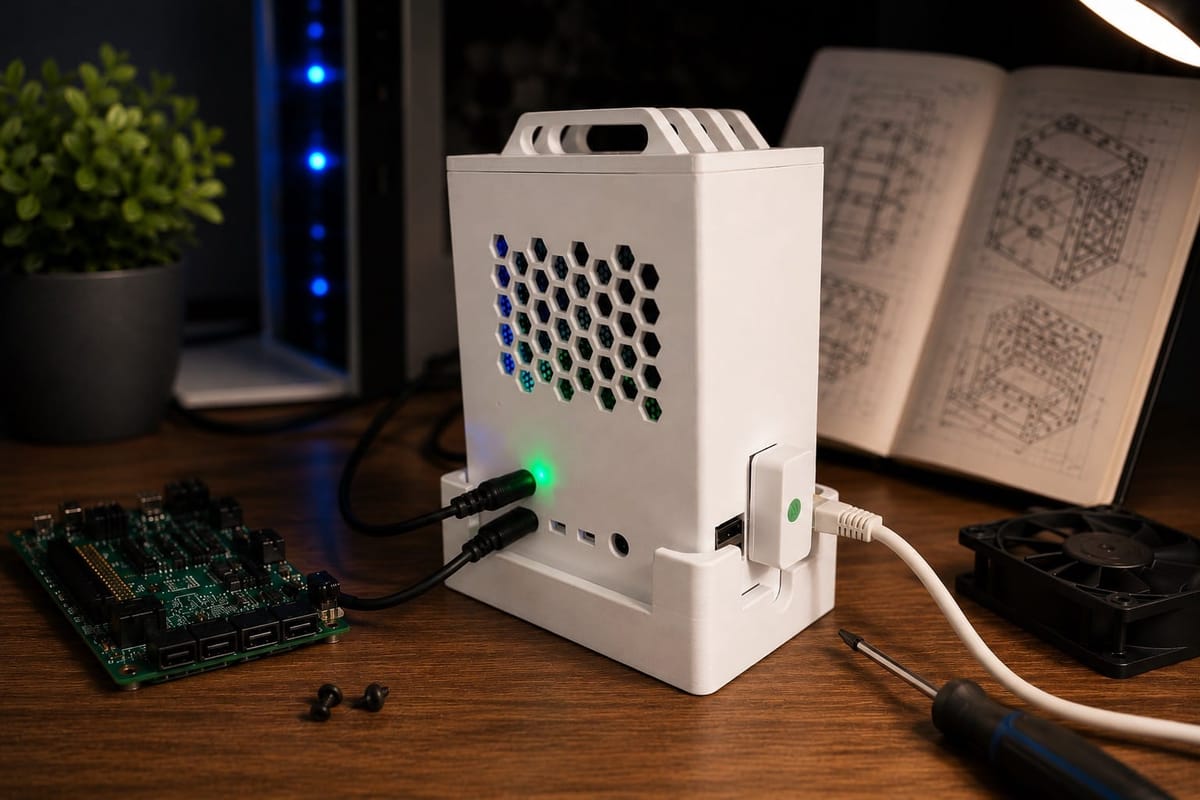
In the first part, I explained how a simple idea to buy a home NAS slowly turned into a much bigger engineering project. This second part is about the device itself, but not in the usual “buy these parts and follow these steps” style.
Hardware changes quickly. Some parts disappear from stores, newer boards appear, prices change, and after a few years the exact bill of materials is no longer the most interesting part of the story. What stays useful for much longer are the decisions behind the build: what constraints existed, what trade-offs were accepted, and why the final system ended up looking the way it did.
Why Raspberry Pi 4
A long comparison between Raspberry Pi 4, Raspberry Pi 5, mini PCs and other platforms would sound more impressive, but it would not be honest. The actual reason was much simpler: I already had a Raspberry Pi 4 available.
At that point, the project was still very raw. I was not sure whether it would survive beyond a few weeks of experiments, so buying a Raspberry Pi 5 just for this idea felt unnecessary and too expensive. I wanted to prove that the concept worked first and only then consider investing in better hardware.
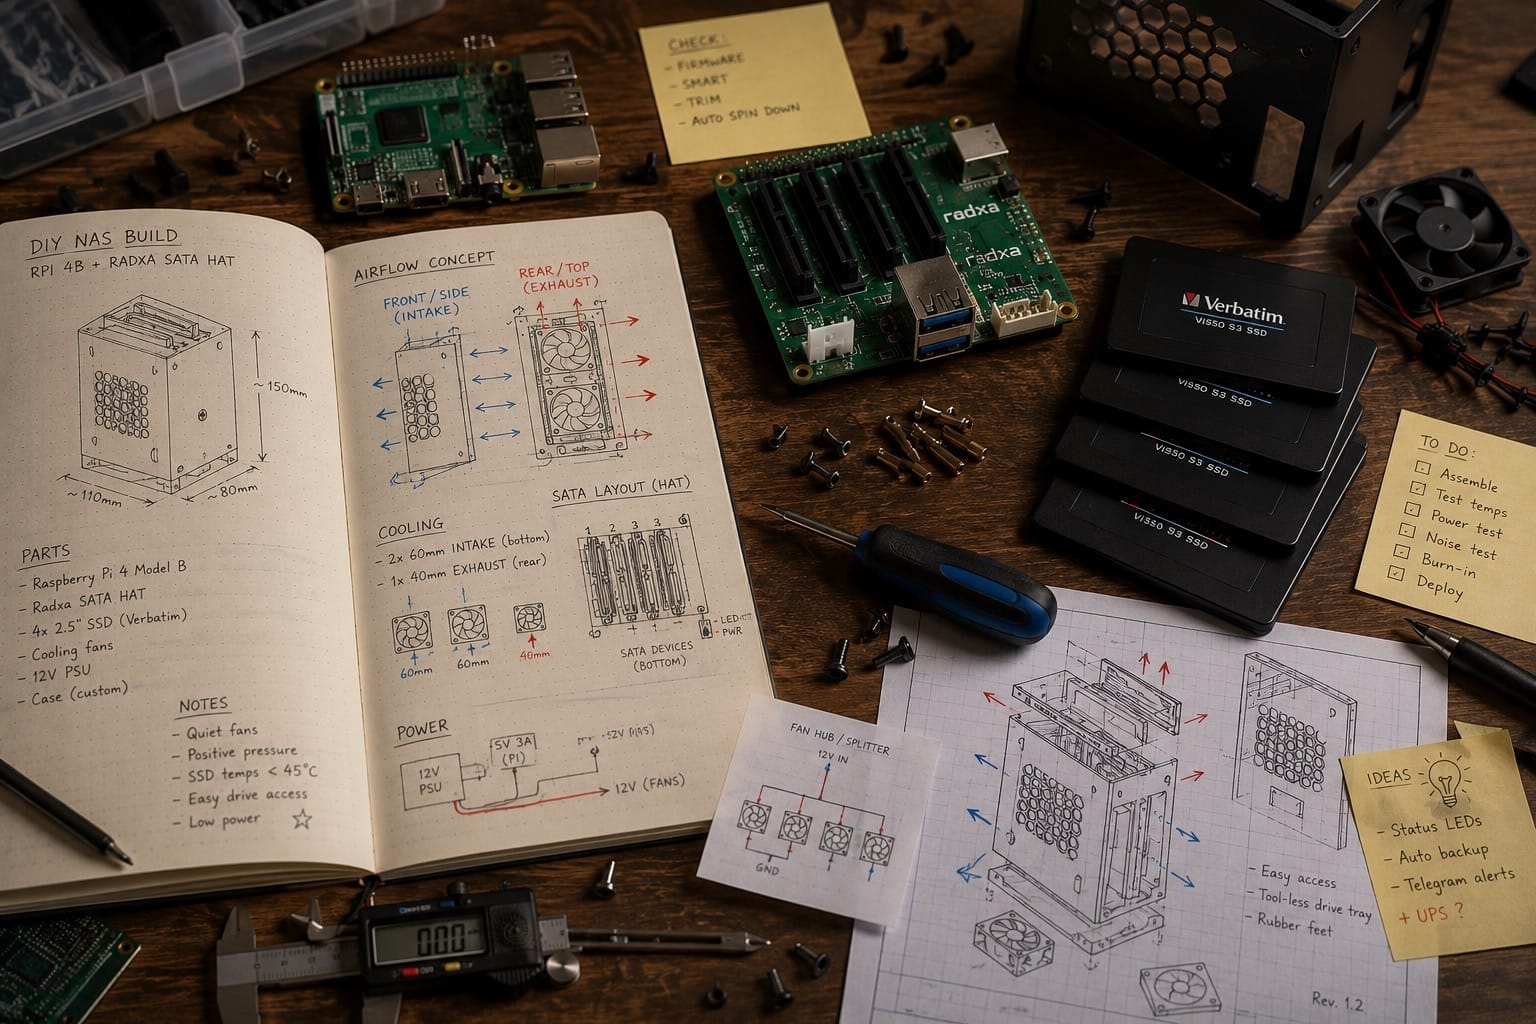
The first serious purchase was not the computer itself, but a Radxa SATA HAT, which cost around 60 euros. That board made the whole idea possible because it allowed the Raspberry Pi to connect to multiple SATA drives and behave like a real NAS instead of a single-disk experiment.
After that, I found a good deal on four 2 TB Verbatim Vi550 S3 SSDs at around 169 euros per drive. That was the moment when the project stopped being something built only from spare parts. It became a system I actually wanted to make reliable enough for daily use.
Why Four Drives
The number of drives was not only a design preference. It was also a hardware constraint. The Radxa SATA HAT supported up to four SATA drives, and that limit naturally shaped the storage architecture.
I did consider bigger designs with six drives or more, but they immediately pushed the project into a different category. More drives meant a different hardware platform, a larger enclosure, more power, more cooling, more cables and more complexity. For a home NAS, that felt like the wrong trade-off.
Four drives became the balance point between what the hardware supported and what I actually needed. From the beginning, I also wanted to split the storage into two logical areas: one for media and user data, and another for backups. That naturally led to two independent RAID1 arrays instead of one large pool.
The first mirror would store media, documents and general files. The second mirror would be dedicated to backups from Home Assistant and other home services. This separation made the system easier to understand and easier to reason about when something eventually breaks.
Why RAID1
When people discuss NAS builds, the conversation often jumps straight to RAID5, RAID6, RAID10, ZFS or Btrfs. Those options are interesting, but for this project most of them were unnecessary.
I was not trying to maximize usable capacity. I was not building for benchmark numbers. I wanted something predictable, easy to recover, and simple enough to still understand a few years later.
RAID1 was the most honest compromise. Yes, it costs half of the raw capacity. But in return it gives simple recovery, understandable failure modes and fewer surprises during maintenance. For a small home NAS, that mattered more than squeezing out a little more usable space.
The final structure was intentionally boring:
2 × SSD -> RAID1 -> media / user data
2 × SSD -> RAID1 -> backups
That design matched the physical constraint of four drives and the logical requirement to keep media and backups separated.
Why I Designed a Custom Enclosure
Once the storage architecture was clear, the next question was the enclosure. I looked at existing Raspberry Pi NAS cases, but almost every option forced a compromise that I did not like. Some were too large. Some had awkward cable routing. Some made disk access painful. Others looked nice in photos but did not feel practical for long-term maintenance.
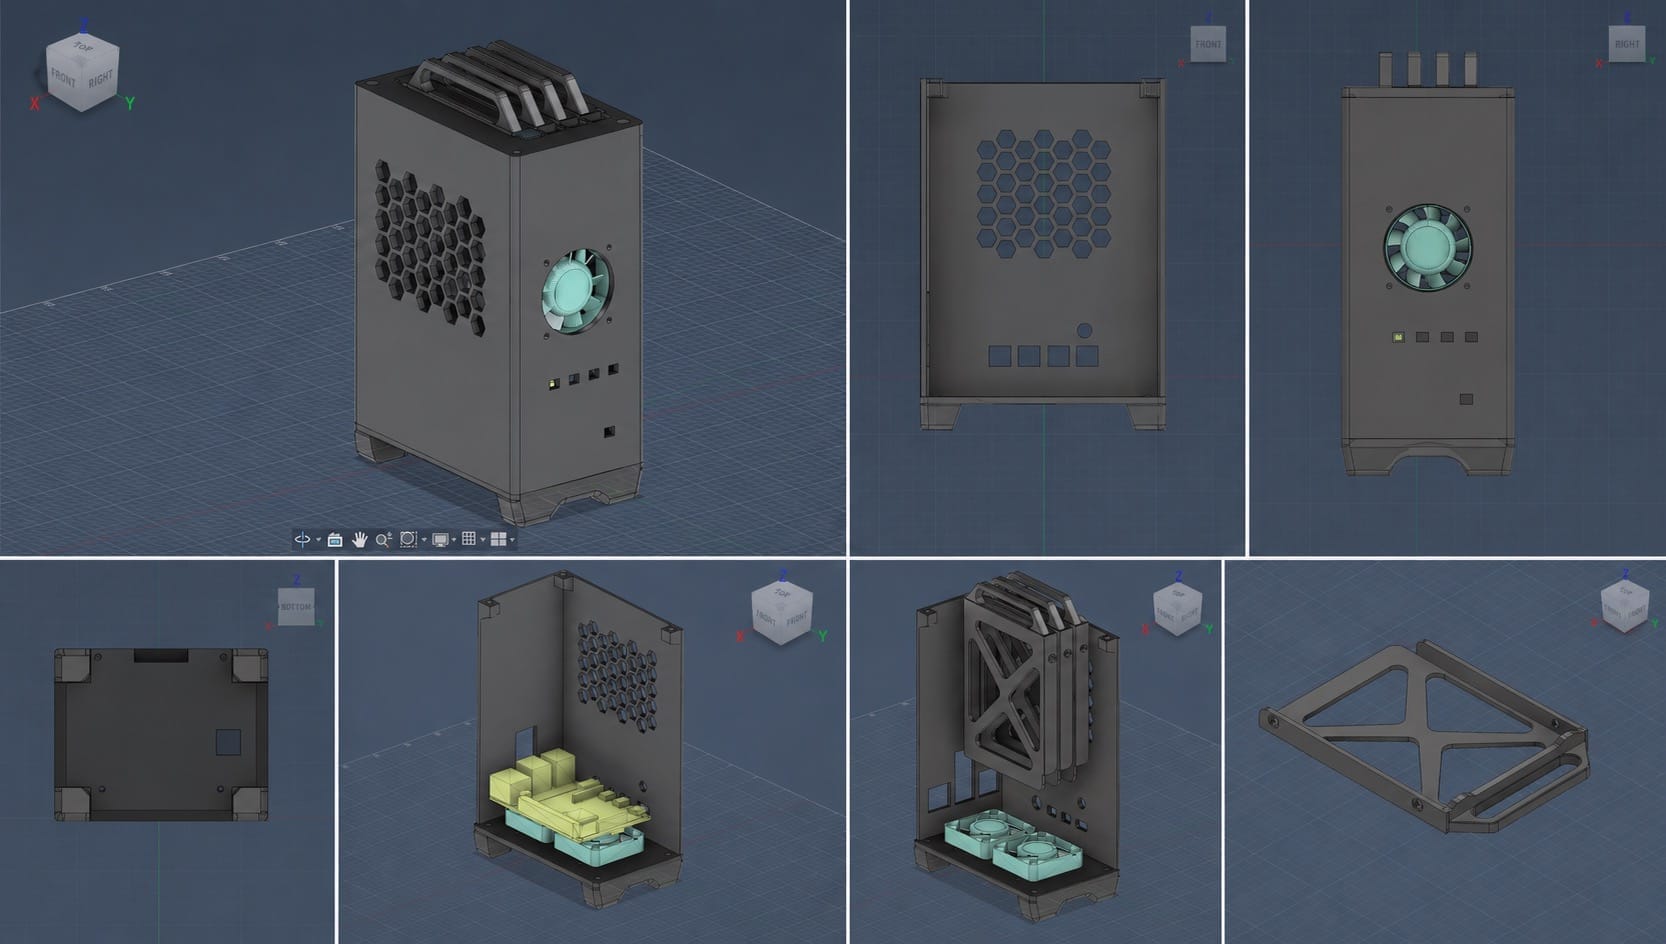
I was looking for a minimal form factor that would take as little space as possible while still being functional. The enclosure had to cool the critical components, expose all the important board outputs, and remain serviceable without turning every small change into a full teardown.
The key requirements became clear pretty quickly:
- compact footprint;
- access to Raspberry Pi ports without disassembling the case;
- cooling focused on the components that actually get hot;
- simple assembly and maintenance;
- replaceable parts;
- removable drive trays.
The last point became especially important. I did not want to disassemble half of the enclosure just to replace one SSD. Each drive needed its own removable tray, so any disk could be pulled out independently without touching the rest of the system.
That sounds like a small detail, but small details become very important after a device stops being a prototype and becomes part of your home infrastructure. The moment a drive needs to be replaced, you start appreciating every design decision that makes maintenance less annoying.
At some point it became clear that finding the perfect ready-made enclosure would probably take more time than designing my own. So I opened Autodesk Fusion 360 and started building the first version.
The Enclosure Was Not Finished in One Attempt
The first version was not the final one. It was simply the first version that allowed the system to exist outside of a pile of boards, drives and cables.
From there, the enclosure evolved through real usage. I changed internal layout, airflow, fan placement, access holes, drive trays and small mechanical details that looked irrelevant in CAD but became obvious once the device was assembled and running.
That was one of the more useful lessons from the hardware side of the project: a good enclosure is hard to design purely in CAD. You can model clearances and airflow ideas, but real problems appear only when the device starts living on a shelf, connected to power, network and other hardware around it.
Why I Moved Away From OpenMediaVault
The first software version ran on OpenMediaVault, and it worked well. In fact, OpenMediaVault gave me exactly what I needed at the beginning: a web interface, RAID management, Samba configuration, user management and basic monitoring. For many home NAS setups, that is probably the right choice.
Later, I started to suspect that OpenMediaVault was responsible for resource usage and responsiveness issues. That assumption turned out to be wrong. The real problem was elsewhere, but by the time I understood that, I had already moved to a clean Debian setup.
I do not consider that move a mistake. It gave me complete control over the system. Every service, mount, monitoring script and configuration became explicit. Instead of relying on a general-purpose NAS control panel, I started building my own monitoring and control layer around the system.
Over time, Grafana became the main place where I wanted to observe the NAS: disk health, RAID state, temperatures, storage usage and service status. The project moved from “I need a NAS UI” toward “I want my own control plane for this system.”
That does not make OpenMediaVault a bad solution. Quite the opposite. I would still recommend it for many home NAS builds. But my project gradually stopped being just a NAS and became an engineering playground for storage, monitoring and reliability experiments.
What Comes Next
At this point, the main shape of the system was clear: Raspberry Pi 4, Radxa SATA HAT, four SSDs, two RAID1 arrays, a custom Fusion 360 enclosure, removable SSD trays and a clean Debian installation.
For a short moment, it felt like the hardest part was already done.
It was not.
The next phase was about running the system for real: performance issues, unexpected bottlenecks, wrong assumptions, bridge problems, monitoring with Grafana and the slow process of turning a working prototype into something I could trust.
That will be the next part.
Downloads
The STL files for this enclosure are included with this article bundle:
These files are shared as part of the project history. They may need adjustments depending on your hardware, printer tolerances and exact component layout.